Friday 3 August 2012

Urban Decay 24/7 Shadow Sticks

Hi,

I cant believe it's been so long since my last post ! Where did that time go ? it's scary!!

Anyway, today I have some Urban Decay 24/7 Shadow Pencils to show you,


I picked these up during a recent co buy on BuyaPowa , for the grand price of £15.45 including postage, not bad at all !
There are 5 travel size pencils, designed to give waterproof and crease free  and blendable colour that lasts, it was the crease free aspect that appealed to me because, having quite oily lids, I find it hard to get shadow to last and do suffer a lot with creasing.

 My initial impressions were excellent, the colours are lovely, from bottom to top we have - 
Juju, a soft taupey beige,
Sin, champagne beige
Rehab, mid brown
Delinquent, Vivid purple
and Clash, bright turquoise.

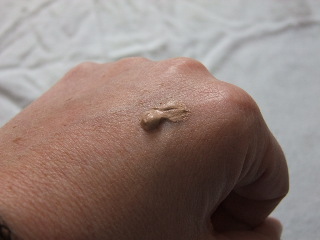
The colour pay off is excellent and if you work quickly the colours do blend nicely before setting on the skin, the picture below was taken after rubbing firmly over the colours and as you can see they haven't budged.


As I mentioned I do have oily lids and when using powder shadows, I find I can virtually eliminate creasing by using a small dab of No7 Shine Free Face Primer, available from Boots, on each lid, followed by an eyeshadow primer, I'm currently using an MUA one, online or in Superdrug stores.

Because these shadow pencils emphasised that they were crease free, and the test on the swatches was so successful, I chose to try them on my eyes with just the No 7 Shine Free primer and unfortunately after about 2 hours I did notice quite bad creasing, I used the lightest two colours, so it wasn't too noticeable but I think with the darker shades this would be a problem for me.

I will try them again with an eyeshadow primer as well, and I really hope that works because I do love the colours, I'll let you know how I get on.

Have you tried the Urban Decay 24/7 pencils, how did you get on ?

Nicola 

Thursday 15 March 2012

Cards

I hadn't made a card for ages, mostly due to the fact that all my stash had been moved to the garage ! 
But I recently got around to tidying to make my tools etc accessible again, so I decided to make my Mother's Day cards this year, and here they are....


This is the first one I made, I decided to do some quilling as that was also something I hadn't done for ages, I'm quite pleased with how it turned out !
The torn strip of paper is a Pink Petticoat design., I love digital downloads and the Pink Petticoat range come in such an amazing array of colours, the image stamps are beautiful as well !

This is the second card, again a quilled design but a bit more simple this time, you can't see from the picture but there is a trail of glitter between the butterflies, and the edge of the card is finished with faux stitching.
I printed the sentiments on both cards using a font from my computer.
So, there they are, my first attempts at card making in quite some time, but I really enjoyed making them, hope you like them !
Nicola


Monday 12 March 2012

Update

I know its been a while since my last post, so I thought I'd give you a quick update on what I've been up to.
I've been thinking for a while of training as a Make Up Artist, as a bit of background, when I left school I was accepted to train as a Beauty therapist, however I also got offered a place to do my Nursing Training, I plumped for the Nursing, did my training and qualified as a paediatric nurse, I never really enjoyed it though and ended up leaving the profession, I always wished I'd done the Beauty Therapy instead.

Fast forward many years ! and now both my children are at full time school, I've been wanting to do something for myself and in the process hopefully find a career that I actually enjoy.

So, I've been researching different Make Up Artist courses, I've signed up to do an ICS distance course which will, hopefully, result in me gaining a BTEC in Make UP artistry.

Ideally I would have loved to do a hands on course but where I live, there just don't seem to be any schools, and travelling any distance is impossible whilst having to work around the school run!

I'm waiting for my course materials to arrive, then I'll be roping whoever I can in, to model for me !

If anyone has any experience of this type of course, I'd love to hear from you, any advice is welcome !

Nicola

Monday 19 December 2011

December GlossyBox

So, its been ages since I last blogged, but here I am again !
I recently subscribed to GlossyBox, I'd been debating if I should for a while and after reading positive reviews of the December box, I thought the time was right !
Here is the box I received
The packaging was lovely, a sturdy, red Christmas edition box, printed inside, with the contents hidden under tissue paper tied with black ribbon.
The contents of my box were

Blink + Go Hi-Definition mascara  full size

Cargo Cosmetics Classic Lip Gloss in Tokyo 0.45g

Deborah Lippmann Razzle Dazzle Mini Nail Varnish with Stripped to Go Sachet

MeMeMe Seventh Heaven Facebase 10ml

Rituals Foaming Shower Gel in Fujiyama  full size

I have to say, I'm impressed with the contents of this box, it is excellent value, with the two full size products alone having a value of over £20.00.

I love the MeMeMe facebase, it is a lovely light texture, that glides on easily and leaves my skin feeling soft all day, and as it is designed to do, it creates the perfect base for applying make up, the only (tiny) concern I have is that it has quite a strong citrus fragrance, now this doesn't worry me at all, but if you're not keen on fragranced face products, its something to be aware of.


The Rituals foaming shower gel is also lovely, you only need a tiny amount to create a rich, moisturising lather and the fragrance is beautiful.

I have yet to try the Deborah Lippmann polish but it is very pretty and I'm sure this will be my Christmas polish as it is so sparkly and festive !
This picture doesn't do it justice

The Cargo lip gloss is also very pretty, a slightly peachy pink that feels moisturising on the lips,

Lastly, the Blink + Go Hi- Definition mascara, I  have used this a few times now and it does lengthen my lashes and is definitely flake free, and although I don't think it will be replacing my favourite Rimmel mascara, it seems a good product that does what it says and will be a good alternative for times when I need a waterproof mascara.

I should also mention that the card received with the box, has discount codes for three of the products and I will definitely be making use of a couple of those !

So overall, I'm really pleased with this box and I'm very glad I signed up to GlossyBox in time to receive it, I can only hope future boxes are as impressive !

Thursday 15 September 2011

Max Factor Ageless Elixir

I have been a member of the website Super Savvy Me for some time, I recently upgraded my membership to join the Savvy Circle, here you can apply to take part in projects to trial new products etc.
I was lucky enough to be chosen to take part in the trial for the new 
Max Factor Ageless Elixir 2in1 Foundation + serum.
I was excited to receive my starter kit a few days ago

The kit contained a full sized product for me to test, as well as lots of samples to give out to friends and family, money off vouchers, feedback sheets and a product information guide.

Here is some information about the foundation

'Max Factor Ageless Elixir 2in1 Foundation + Serum combines a foundation which instantly helps to reduce the appearance of wrinkles and fine lines with a unique serum with SPF 15 which protects your skin against signs of ageing'.

I received the product in Shade 50 natural, here it is on my hand
I don't normally use a cream foundation as in the past I have found them too mask like, I prefer the natural finish of a mineral powder, however I have been really pleasantly surprised by this new foundation.
I have applied using my fingers and the foundation blends across the skin nicely without settling into fine lines (of which I seem to be getting quite a few !),  and the shade is ideal for my medium to light skin tone.
I should mention that whilst my skin has become drier over the years, it can still tend to be a bit shiny around my nose and chin, but this foundation seems just right for me as it leaves a nice soft matt finish, but my skin feels moisturised and soft.
I applied quite a light layer and the finish gave perhaps slightly more coverage than my usual mineral powder, but I have found you can increase the coverage by applying another layer.
I like the fact that it has an SPF 15 , although because I worry about sun induced damage I will still use a higher protection day cream underneath.
As yet I can't comment on the anti ageing benefits of the serum but overall I am very impressed and would definitely recommend this product and continue to use it myself.
Well done Max Factor , you've managed to convert this non foundation wearer !!
Here's a quick pic after I'd used the product, I find it so hard to get a good picture, but hopefully you get the idea!


Tuesday 30 August 2011

I won !!!! And quick nail update

I'm so excited, I had an email this morning letting me know I had won the Caudalie giveaway over at the Laura Lou blog, I have never tried this range before so I'm looking forward to trying it and being able to review it for you, a big Thank You to Laura Lou !

I also wanted to give a quick update on my nail SOS project, I have been using the Leighton Denny Bio Build range to try and strengthen my nails following the removal of my acrylic overlays.
My nails were left so thin and bendy but after about 2 weeks of using the Bio Build products my nails are so much stronger, they feel a lot less bendy and actually a little thicker, a big success !!
I started by using the shield and serum, but then I saw Leighton on QVC and he mentioned the intensive 14 day routine of using the serum twice a day on bare nails, so this is what I have been doing since and will continue to do until the damage seems to have grown out, then I will probably start using the shield as a base coat under polish, and the serum when I have bare nails.
I would definitely recommend this range to anyone with thin, weak nails, if you do try them, let me know how you get on.


- Posted using BlogPress from my iPad

Thursday 25 August 2011

Not strictly a beauty product.......

but definitely good for the skin !
I have recently got in to juicing and smoothie making after following Jason Vale's ( The Juice Master ) 3 day detox plan.
I lost 4 pounds in those 3 days and have continued to drink juices or smoothies about twice a day since, one of the benefits I have noticed is that my skin seems brighter, a bit more 'glowing' than before, I put this down to the extra nutrients which I have to admit my diet was seriously lacking before !
Anyway on to my new Vitamix blender, I have known about these for a while, you can learn more here 
basically it is a very powerful blender with a 2 HP motor that allows it to blend whole fruits and veg, the downfall is the price, they are a very expensive piece of kit !!
My old blender was starting to give up on me so I was looking at getting a new one, I was flicking through the shopping channels and noticed that Ideal World had a Vitamix as their pick of the day, it was a refurbished model, so a bit cheaper than usual and on Flexi Pay , yaaay !!!
My wonderful husband treated me to the Brushed Aluminum one as a early Christmas present (for about the next 5 years I think !!).
I have played with it a few times, made a few smoothies  and I'm very impressed !, today I thought I'd have a go at Tomato soup, yes, the friction created by the blades and motor allows you to make hot soups.
The soup was delicious so I thought I'd put the recipe on here in case anyone wanted to try.

Vitamix Tomato Soup
Makes 1 large serving

1 box of chopped tomatoes with garlic and olive oil (or your choice of flavour)
2 Large fresh tomatoes
Quarter of an orange or red pepper
Thin slice of fresh ginger
Splash of soy milk
Handful of unsalted Cashew nuts
About 1 Tbs of tomato sauce
Small piece of a sweet chilli from a jar (optional)

Halve the tomatoes and remove the seeds from the pepper, place everything in the Vitamix , wetter ingredients first.
Start on Variable one, increase speed to 10 then switch to high, blend until hot, I then switch back to variable and reduce the speed until a small vortex appears in the mixture and I can see bubbles, I leave it on this speed for a few moments to allow the bubbles to spin out, I read that this means the liquid is less frothy.
Enjoy a beautiful silky soup.